Historical dollars
I’ve read a few books recently where references were made to dollar amounts from many years ago. However, I often find it difficult to understand the context of, say, $10,000 in 1829.
But Wolfram Alpha can give you a rough approximation by applying inflation data. This isn’t perfect but is useful to get a general idea of what a similar amount might be today. (There isn’t all the context needed for a more accurate determination, and the underlying basket for inflation measures can be misleading.)
Handily, there’s a Wolfram Alpha API we can use to get this information programmatically. I originally wrote this script as a command-line tool, but how often do you read at your computer with a terminal window open? So the one in this post uses Pythonista and its ui module to make things more practical.
The code to get the new amount is pretty trivial:
 1from __future__ import division
 2
 3from datetime import date
 4from xml.etree import ElementTree
 5import requests
 6import ui
 7
 8
 9def calculate_amount(sender):
10  """Convert given dollar amount for given year to current dollars"""
11  amount = view['amount'].text
12  year = view['year'].text
13
14  if not (amount and year):
15    return
16
17  api_key = 'YOUR API KEY IN HERE'
18  api_url = 'http://api.wolframalpha.com/v2/query'
19  query_template = '${amount} ({past_year} US dollars) in {current_year}'
20  query = query_template.format(amount=amount,
21                                past_year=year,
22                                current_year=date.today().year)
23  parameters = {'appid': api_key,
24                'input': query,
25                'format': 'plaintext',
26                'podtitle': 'Result'}
27  response = requests.get(api_url, params=parameters)
28  xml_soup = ElementTree.fromstring(response.content)
29  new_amount = xml_soup.find('pod/subpod/plaintext').text.splitlines()[0]
30  view['result'].text = new_amount
The calculate_amount function above is called on a button press (hence the sender argument) and fetches the text from a couple of UI elements (all that view subscripting), bailing out if either the amount or year is missing.
The query template (line 19) is how Wolfram Alpha parses historical dollar calculations (shown as “Input interpretation” on the website) so we can skip as much parsing time as possible.
Requests makes sending the query a doddle, and we use an exact XPath expression to get at the result in the response. There’s an API explorer so you can get a handle on the structure. (Normally I’d use Beautiful Soup, but Pythonista doesn’t include lxml, so BS parses it as HTML and there’s really no point in risking — however slightly — that causing some problem. ElementTree isn’t bad if you’re doing something simple, anyway.)
Lastly we update another UI element to show the result. Pretty simple.
With the UI, you’ve got two choices: make it in code or use Pythonista’s UI editor. I chose to do it in code, because the UI editor saves a .pyui JSON file that takes a little work to share.
But now I would recommend people use the editor, as actually getting the code to work was a bit of a headache too. For the record: Ole Zorn has done an incredible job with Pythonista and the UI tools are incredible. However: the ui module seems to expose the Cocoa way of making GUIs, so unless you’ve got an understanding of that you may be in for some bumps. Helpfully, you can view the ui module documentation online Here’s the rest of the code:
33def setup_view():
34    view = ui.View()
35    view.name = 'Historical Dollars'
36    view.background_color = 'white'
37    view.width, view.height = ui.get_screen_size()
38
39    amount_field = ui.TextField()
40    amount_field.name = 'amount'
41    amount_field.keyboard_type = ui.KEYBOARD_DECIMAL_PAD
42    amount_field.placeholder = 'Dollar amount'
43    amount_field.width *= 2
44    amount_field.height /= 2
45
46    year_field = ui.TextField()
47    year_field.name = 'year'
48    year_field.keyboard_type = ui.KEYBOARD_NUMBER_PAD
49    year_field.placeholder = 'Year'
50    year_field.width *= 2
51    year_field.height /= 2
52
53    button = ui.Button(title='Calculate')
54    button.action = calculate_amount
55
56    result_label = ui.Label()
57    result_label.name = 'result'
58    result_label.width = view.width
59    result_label.alignment = ui.ALIGN_CENTER
60
61    horizontal_centre = view.width * 0.5
62    field_spacing = amount_field.height * 1.5
63    amount_field.center = (horizontal_centre, amount_field.height)
64    year_field.center = (horizontal_centre,
65                         amount_field.center[1] + field_spacing)
66    button.center = (horizontal_centre,
67                     year_field.center[1] + field_spacing * 0.75)
68    result_label.center = (horizontal_centre,
69                           button.centre[1] + field_spacing * 0.75)
70
71    view.add_subview(amount_field)
72    view.add_subview(year_field)
73    view.add_subview(button)
74    view.add_subview(result_label)
75
76    return view
77
78
79view = setup_view()
80view.present('sheet')
And here’s what it looks like in action:
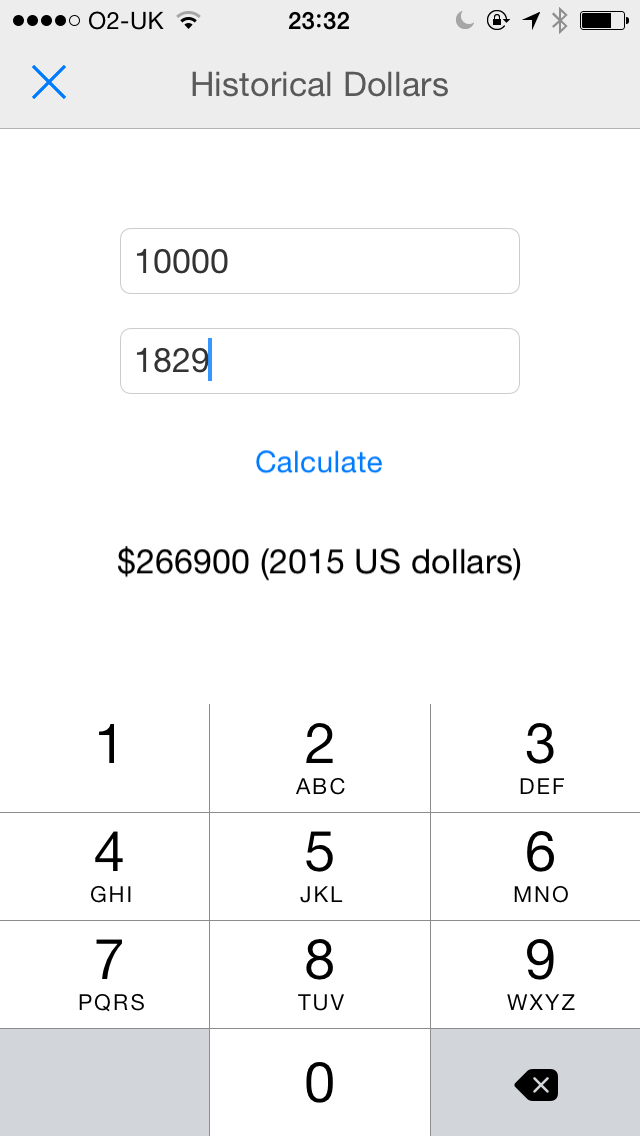
The thing that really tripped me up was .flex on views, for resizing the element based on its containing view. In the code above this isn’t used. I initially followed the example code from the documentation and had all sorts of fun trying to work out why the view spacing was screwed up.
Another problem was expecting the ‘master’, containing view (instantiated on line 34) to have the same size as the screen, when it seems to act kind of like HTML elements do when they’re full of floated elements (they collapse). That’s why I set the containing view’s size on line 37. (get_screen_size also seems to always return the portrait size.) All sorts of headaches resulted from this (centring elements based on the view’s centre particularly).
Otherwise, it’s so straightforward and repetitive that I’m not going to explain most of the lines. It works well enough on an iPhone 5-sized screen in portrait mode (elements are off-centre in landscape) but for smaller screens you may want to shift things about a bit vertically.
There are a couple of things to note. The names you give to elements are how you pick them out later (check out lines 11 and 40). Setting the button’s action (line 54) is obviously key, and you just give it a function object. And specifying the keyboard type for the two text fields relieves the need to do input validation (though the decimal keyboard lets you type multiple points), but frankly anyone who might use this should understand that it’ll break if you type in something funky.
I’ve put the whole file online if that’s easier for anyone. You just need to paste it into an empty script in Pythonista and run it.